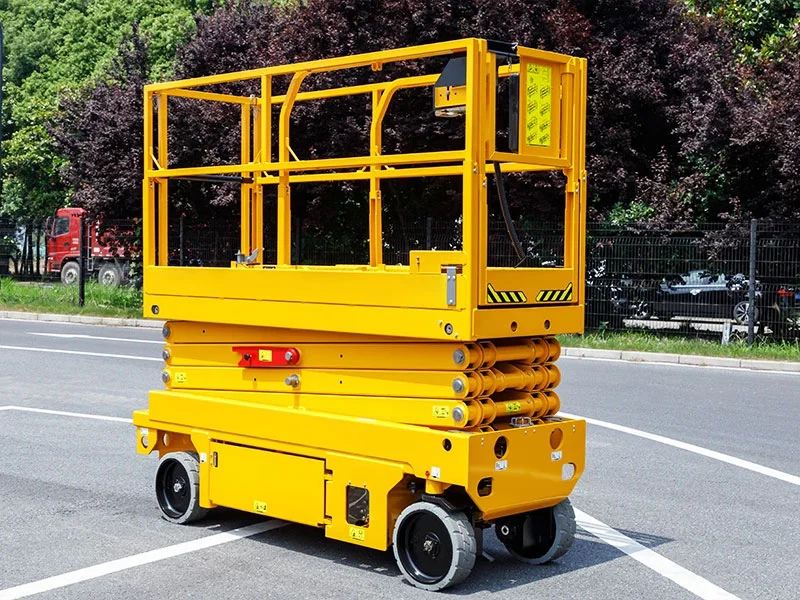
Operating a scissor lift is a daily reality for many in construction, warehousing, and maintenance. However, the unsung hero of every productive shift is the battery. Learning how to charge a scissor lift correctly is the difference between a machine that lasts for a decade and one that fails in eighteen months.
In this comprehensive guide, we will explore the nuances of battery maintenance, safety protocols, and the technical steps required to keep your aerial work platforms running at peak performance.
Understanding Scissor Lift Battery Types
Before you plug in, you need to understand what is under the hood. While diesel-powered lifts exist for heavy-duty outdoor terrain, most indoor and slab-rated lifts are electric.
Electric vs. Diesel Scissor Lifts
Diesel lifts use an internal combustion engine and do not require traditional “charging” in the way electric models do. Electric lifts, however, rely entirely on a battery bank. The efficiency of your scissor lift battery charger depends heavily on the chemistry of these batteries.
Common Battery Types
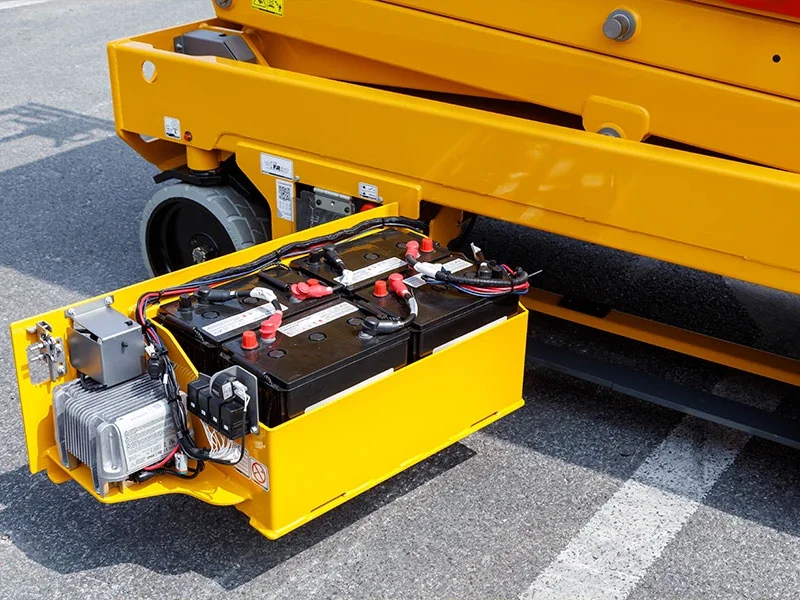
- Lead-Acid Batteries: These are the most common. They are cost-effective but require “watering” (adding distilled water) and regular maintenance. They are sensitive to “memory effect” and deep discharges.
- AGM (Absorbent Glass Mat) Batteries: A type of lead-acid battery that is sealed and maintenance-free. They don’t require watering and are more resistant to vibration.
- Lithium-Ion Batteries: The modern gold standard. They charge faster, weigh less, and have a much longer lifespan, though the initial cost is significantly higher.
How battery type affects charging methods:
A 24 volt battery charger for scissor lift applications might behave differently depending on whether it’s charging Lead-Acid or Lithium. Lead-acid batteries require a “bulk, absorption, and float” stage, while Lithium-ion requires precise voltage management to prevent overheating.
Why Proper Charging Matters
Consistency is key. If you don’t know how to charge a scissor lift correctly, you aren’t just inconvenienced; you’re losing money.
Extends Battery Lifespan
Batteries have a finite number of “cycles.” Improper charging—like opportunity charging (plugging in for 10 minutes during a coffee break)—can “trick” lead-acid batteries into completing a cycle prematurely, shortening their total life.
Prevents Downtime and Costly Repairs
A dead lift in the middle of a warehouse aisle is a logistical nightmare. Proper charging ensures the machine is ready when the shift starts. Furthermore, replacing a full set of deep-cycle batteries can cost thousands of dollars—an expense easily avoided with good habits.
Ensures Consistent Lift Performance
As voltage drops, the hydraulic pump has to work harder. This can lead to sluggish lifting speeds and jerky movements. A fully charged battery ensures the scissor lift charger amp draw remains stable and the motor operates within its intended parameters.
Supports Workplace Safety Compliance
Batteries contain sulfuric acid and produce explosive hydrogen gas during the final stages of charging. Following a standardized process for how to charge a scissor lift ensures you remain compliant with OSHA and other safety bodies.
Step-by-Step Guide: How to Charge a Scissor Lift
Following a specific sequence is vital for safety and equipment longevity. Here is the definitive process for how to charge a scissor lift.
Prepare the Equipment
- Park on Level Ground: Always charge on a flat, stable surface.
- Clear the Area: Ensure the charging station is well-ventilated to dissipate gases.
- Power Down: Turn the “Emergency Stop” button (E-Stop) to the “OFF” position on both the platform and base controls.
- Inspect Cables: Check the battery charger scissor lift cables for frays, nicks, or burnt connectors.
Connect the Charger
Most modern lifts have a built-in scissor lift battery charger.
- Locate the AC plug (usually at the rear or side of the base).
- Use a heavy-duty extension cord (12-gauge or 14-gauge) to minimize voltage drop.
- Plug the cord into a grounded GFI outlet.
- Confirm that the 24v scissor lift battery charger LEDs illuminate, indicating the start of the cycle.
Monitor the Charging Process
While modern battery chargers for scissor lifts are automatic, you should still check back.
- The 80/20 Rule: Try not to let the battery drop below 20% charge.
- The Long Soak: Most lifts require 8 to 10 hours for a full charge. It is best to charge them overnight.
- Check Indicators: A flashing yellow or red light usually indicates a fault, while a solid green light means the cycle is complete.
Disconnect and Store Properly
- Unplug the extension cord from the wall first, then from the lift.
- Stow the cables neatly to prevent tripping hazards or drive-over damage.
- For an upright scissor lift battery charger, ensure the protective cover is closed to prevent moisture ingress.
Safety Tips When Charging a Scissor Lift
Safety should be your first priority when learning how to charge a scissor lift.
- Wear PPE: When checking lead-acid batteries, wear safety goggles and acid-resistant gloves.
- No Smoking: Charging releases hydrogen gas. A single spark from a cigarette or a grinder can cause a battery explosion.
- Ventilation is Mandatory: Never charge a lift in a small, sealed closet. Ensure airflow is sufficient to dilute gases.
- Avoid Overheating: If the batteries feel excessively hot to the touch or emit a “rotten egg” smell (sulfur), stop charging immediately.
Common Mistakes to Avoid
Even experienced operators make mistakes when figuring out how to charge a scissor lift. Avoid these pitfalls:
- Opportunity Charging: Plugging in the lift for 30 minutes during lunch kills lead-acid batteries. Unless you have Lithium-ion, wait until the end of the day.
- Using the Wrong Charger: Never swap a 24 volt battery charger for scissor lift use with a car charger. The charging profiles are completely different.
- Leaving the Lift Plugged in for Weeks: While most chargers have a “float” mode, older chargers can “cook” the battery if left unattended for months during a seasonal shutdown.
- Ignoring the Water Level: If you have flooded lead-acid batteries, charging them when the plates are exposed to air will cause permanent damage.
Maintenance Tips for Better Battery Performance
Knowing how to charge a scissor lift is only half the battle; you must also maintain the hardware.
- Clean the Terminals: Use a mixture of baking soda and water to neutralize acid corrosion on the terminals.
- Check Fluid Levels: For lead-acid types, add distilled water after the charging cycle is complete, unless the plates are already exposed.
- Tighten Connections: Vibrations from driving can loosen battery cables. A loose connection increases resistance and can melt the battery post.
- Equalization Charge: Once a month, perform an “equalization” charge (if your scissor lift battery charger supports it) to balance the cells and remove sulfate buildup.
Troubleshooting Charging Issues
If your lift won’t charge, check these common culprits:
- The GFI Tripped: If the scissor lift charger amp draw is too high for the circuit, it may trip the breaker. Reset the outlet and try again.
- Voltage is Too Low: If batteries are drained to 0%, many chargers won’t “see” them and won’t start. You may need a manual “jump” to bring the voltage up to a level where the 24v scissor lift battery charger can take over.
- Bad Extension Cord: A cord that is too long or too thin will cause a voltage drop, preventing the charger from functioning.

FAQs About How to Charge a Scissor Lift
Can I use the lift while it is charging?
No. Most lifts have an interlock system that prevents operation while the battery charger scissor lift is plugged in. This prevents you from driving away and ripping the cord out of the wall.
How long does a scissor lift battery last?
With proper care and knowing how to charge a scissor lift correctly, lead-acid batteries last 3–5 years. Lithium batteries can last 10 years or more.
How do I know if my scissor lift charger is working?
Check the LED display on the charger. Most will show a charging curve or a percentage. You can also use a multimeter to check the voltage at the battery terminals; it should be higher than the nominal 24V while the charger is active.
Does the scissor lift charger amp draw matter?
Yes. Most chargers draw between 10 and 15 amps. If you have five lifts plugged into one 20-amp circuit, you will blow the breaker.
Can I leave the charger on over the weekend?
Yes, provided you are using a modern, automatic scissor lift charger that features a “maintenance” or “float” mode to prevent overcharging.
Conclusion
Mastering how to charge a scissor lift is a fundamental skill for any operator or fleet manager. By understanding your battery type, following a disciplined charging schedule, and prioritizing safety, you can significantly reduce your operating costs and ensure your equipment is always ready for the job.
Remember, the scissor lift battery charger is a sophisticated piece of electronics. Treat it with respect—keep it dry, use the correct extension cords, and never ignore warning lights. If you treat your batteries well, they will return the favor with years of reliable service.
Whether you are using an upright scissor lift battery charger or a standard 24v scissor lift battery charger, the principles remain the same: Charge fully, maintain the water levels, and always prioritize ventilation. Now that you know how to charge a scissor lift, you can get back to work with confidence!
If you have any questions about scissor lifts or need expert guidance, feel free to contact us anytime. Our team is always ready to help.
Email: info@klingtec.com
WhatsApp: +86 188 6686 3188